As horse owners, leasers, and lovers, we're accustomed to finding creative solutions to enhance our experiences with the animals we choose to spend (all) of our spare time with.
When you're not mucking, cleaning tack, or doing the millions of little chores that pop up daily, we've got some fantastic ideas that you can implement to ensure your horse (or horses) take up every moment you're not with them.
If that sounds like fun to you, you're in the right place. We're going to chat about some really fun things you can do for your herd - from building jumps to organising tack storage and whipping up homemade treats!
There's a world of do-it-yourself projects awaiting you, and in this guide, we'll explore fun and practical DIY projects perfect for horse owners who don't want to do anything that isn't horse-related.
Let's get started!
Build Your Own Jumps

If you don't jump, skip this one. Or if it sounds like something you just can't miss, first learn HOW to jump, then return to this post for further instructions. OR - build jumps as a gift or surprise for your friends who do jump. The options are endless.
Anyway, building jumps is not just a necessity for training; it's also a fun way to get creative and add some flair to your arena or riding area. Ground poles are good for any discipline and most stages of training, so regardless of how you ride, there's something you can take away from this section.
First, here's a simple guide to constructing your own jumps. You'll need:
- Wooden poles (available at your local timber merchant or DIY store)
- PVC pipes or sturdy plastic poles
- Saw
- Drill
- Screws or nails
- Paint (optional)
- Jump cups or brackets
You can get some of these things online or at your local tack or farm supply store. You can also find used items that need a little love, especially when it comes to the jump cups or brackets!
Here's how to execute the build:
- Measure and cut the wooden poles to your desired jump height and width.
- Attach the PVC pipes or plastic poles to the wooden poles using screws or nails, ensuring they are securely fastened.
- Drill holes in the wooden poles to insert the jump cups or brackets, allowing you to adjust the height of the jumps.
- Optional: Get creative with paint to add colourful patterns or designs to your jumps, making them visually appealing for both you and your horse.
If you want to avoid dealing with the building jump standards, you can also get plastic jump blocks and deal solely with purchasing and painting the poles! It's a less time-consuming project, but it's still fun and super productive.
Designing Tack Storage Solutions
As a horse owner, fewer things will feel better to you than keeping your tack and grooming supplies organised. Not only will a little organisation stop you from losing everything (I lose at least three curry combs annually), but it can also make it possible for you to leave the yard when you plan on it.
Here's how to create DIY tack storage solutions. You'll need:
- Wooden pallets or crates
- Hooks or pegs
- Hammer
- Nails or screws
- Drill (if necessary)
- Paint or stain (optional)
Here's how to complete the job:
- Start by repurposing wooden pallets or crates as the base for your tack storage unit.
- Attach hooks or pegs to hang bridles, reins, and other tack items securely.
- Use nails or screws to reinforce the structure and ensure it can support the weight of your tack.
- If desired, paint or stain the tack storage unit to match your barn or stable decor and add a personal touch.
In reality, there are a million ways that you can build your own storage units. You can also buy them already made and put a fresh coat of paint on them. I'm just offering you one idea here, and though it's a good one, you can skip getting this involved. It can be as simple as hanging hooks or bringing in plastic tubs.
If you have tack and supply storage ideas, we'd love to hear them! Make sure you share them with us!
Making Homemade Horse Treats
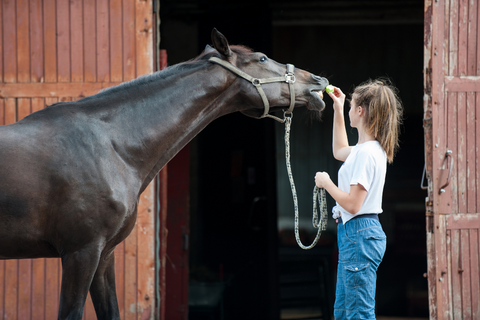
Commercial horse treats are no exception to fillers and gross preservatives. While it's easy to find brands that take the all-natural route, if you have the time, it's always fun to treat your equine companion to delicious homemade treats using simple ingredients you probably already have in your home.
Here are the ingredients for one of my favourite recipes for homemade horse treats:
- 2 cups of oats
- 1 cup of shredded carrots
- 1/2 cup of unsweetened applesauce
- 1/4 cup of molasses
- One tablespoon of vegetable oil
Instructions:
- Preheat your oven to 180°C and line a baking sheet with parchment paper.
- In a large bowl, mix together the oats, shredded carrots, applesauce, molasses, and vegetable oil until well combined.
- Use your hands or a spoon to form small balls or cookie shapes with the mixture and place them on the prepared baking sheet.
- Bake for 15-20 minutes or until the treats are golden brown and firm to the touch.
- Allow the treats to cool completely before serving them to your horse as a tasty reward.
There are hundreds of horse recipes available on social channels and equestrian blogs. Try a few out, and let us know what your herd thinks!
Tailor Your Horse Experience
With a little creativity and elbow grease, horse owners everywhere can tackle a variety of DIY projects to build a better equestrian experience.
Whether you're building jumps, organising tack storage, or whipping up homemade treats, these
projects offer a fun and rewarding way to bond with your equine companion. Plus, you'll add a personal touch to your barn locker or tack room setup. So, roll up your sleeves and unleash your inner DIY enthusiast!


